http://www.rain-watersystems.com/

This site is backed by 26+ years experience and contains insider tricks for professionals and information for homeowners that can be found nowhere else. Visit my WEBSITE and " LIKE " us on Facebook to keep up on our products and activities.

My normal service range is from Santa Monica to San Diego but I have installed copper gutters and rainwater harvesting systems in California, Nevada, Utah, Hawaii and Rwanda.
I have a small but national customer base through my gutter products website @ www.abraingutters.com where I offer rare items such has handmade weather vanes and hand carved and custom family crests for gates cast in aluminum or bronze. Through my websites you can gain knowledge, order products, beautify your home or help grow your business.

Tuesday, March 22, 2011

Water Storage = Earthquake and Emergency Preparedness

Tuesday, March 22, 2011
Earthquake Preparedness - Water is the Key to Survival! 


Loss of safe drinking water is deadly. Most individuals will begin to experience side effects from dehydration after 36 hours. Starvation can be delayed by several days or weeks provided there is an ample, safe water supply.
At the bare minimum, you should store one gallon, per person, per day, for seven days . A three-week supply is ideal.
After an earthquake, city water is vulnerable to contaminants through ruptured pipes and adulterated filtering systems. Do not take adequate water supplies for granted. If you store an ample amount for your family beforehand, you've already greatly increased your family's chance of survival after an earthquake.


I noticed with interest this picture and quote about the conflict in LIBYA;
''Residents live on canned food and rainwater tanks,' he said. Gaddafi's brigades storm residential areas knowing that they won't be bombed there. 'People live in total darkness in terms of communications and electricity.'


So, this isn't Libya; I get it. But we do live in Earthquake country and the vast majority of people I question do not realize that their tap water depends on electricity. No power = no water. The majority have no food storage beyond whats in the freezer and on the pantry shelf.  To those who think that the government will be there on a white horse to protect them should remember hurricane Katrina and the horrendous suffering of those who choose to be in denial about the impending disaster they were warned about.

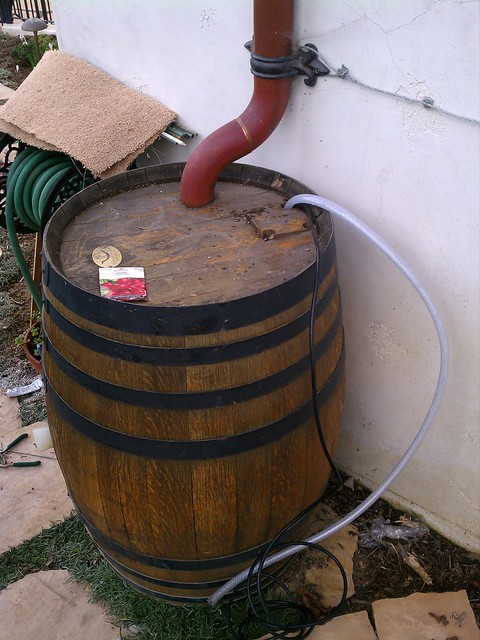
So in this post Japan, post Christchurch, post Chile earthquakes we should all take stock of our capabilities. We decided to fill this 67 gallon rain tank with potable water and bolt it to the garage wall. We have three months food rations and an additional 42 gallons of water in storage, as well as protection, first aid and battery powered communication chargers, lights and radios. We also have 10 gallons of propane fuel, 40 lbs of charcoal, fertilizer and fast growing leafy vegetables in storage.


 Consider ordering one of these slim tanks to mount inside your garage as emergency water storage. They are $268.00 each plus shipping if applicable and I pay all sales tax.


Here is what FEMA has to say;

How Much Water do I Need?

You should have at least a three-day supply of water and you should store at least one gallon of water per person per day. A normally active person needs at least one-half gallon of water daily just for drinking.
Additionally, in determining adequate quantities, take the following into account:
  • Individual needs vary, depending on age, physical condition, activity, diet, and climate.
  • Children, nursing mothers, and ill people need more water.
  • Very hot temperatures can double the amount of water needed.
  • A medical emergency might require additional water.

In more remote communities or those typically affected by wildfires a water storage system may be the only water that is available to save your home. Larger tanks can be equipped with a fire hydrant outlet that the pumper trucks can hook up to.


Saved water can save your home, and maybe even your life.

Monday, March 7, 2011

Water Woes

US farmers fear the return of the Dust Bowl

For years the Ogallala Aquifer, the world’s largest underground body of fresh water, has irrigated thousands of square miles of American farmland. Now it is running dry.

The water in the Ogallala aquifer is being traded and sold by oil tycoons and mega corporations. This massive underground water deposit supplies water to the corn belt in Nebraska and other states, who in turn supply grain and corn to poor nations around the world. All the states that tap into this body of water have management plans that restrict and regulate how much can be harvested except Texas. The Lone Star state allows whoever has a right to the water to pull as much of it as they want and sell it to the highest bidder. The problem is that other states are being impacted and it trickles down to higher food prices in places that simply cannot be absorbed, like Africa and financially devastated areas in the United States. I have always been a conservative and a capitalist ( I voted for George W. Bush in both elections, and I am a gun owner and small business person ) but I now recognize that there are no limits to personal greed, and that sometimes there indeed must be sane limits to capitalism.

1997 map of the Ogallala Aquifer


If you'd care to read more about this aquifer and see other maps showing just how much this body of water has been depleted please click here.  The problem isn't just in the small town of Happy Texas where; " from the early 1950s the boom was on. Some of the descendants of Dust Bowl survivors became millionaire landowners. 'Since then,' says David Brauer of the US Agriculture Department agency, the Ogallala Research Service, 'we have drained enough water to half-fill Lake Erie of the Great Lakes.' Billions upon billions of gallons – or, as they prefer to measure it, acre-feet of water, each one equivalent to a football field flooded a foot deep – have been pumped. 'The problem,' he goes on, 'is that in a brief half-century we have drawn the Ogallala level down from an average of 240ft to about 80.'
Brauer's agency was set up in direct response to the Dust Bowl, with the brief of finding ways to make sure that the devastation never happens again. If it does, the impact on the world's food supply will be far greater. The irrigated Plains grow 20 per cent of American grain and corn (maize), and America's 'industrial' agriculture dominates international markets. A collapse of those markets would lead to starvation in Africa and anywhere else where a meal depends on cheap American exports. 'The Ogallala supply is going to run out and the Plains will become uneconomical to farm,' Brauer says. 'That is beyond reasonable argument. Our goal now is to engineer a soft landing. That's all we can do.'"  Source of quote.

So, the reality is that our senseless water policies are going to result in starvation and deaths in poor countries like Africa and result in turmoil and economic hardship for average Americans. The town of Happy Texas gets about 10" per rain a year and the choices are stark; adopt advanced permaculture crop technologies and harvest the rain or return to the dust bowl era and watch that dying town perish for once and all.

Of course, the agencies that define policy and regulate consumption can't agree on anything and there is in-fighting and politics involved in the decisions; from this article:

 "
“ Eight independent scientists worked on this report and have reached the same conclusion that real irrigation experts have been saying for years: that the water use efficiency potential in agriculture is limited.
The PPIC report is criticized because it doesn’t draw the same conclusions that the Pacific Institute wants. It is important to note that the Pacific Institute’s conclusions are based on flawed assumptions that have been identified by real irrigation experts from the California State University system and the University of California. A 2008 report by the Pacific Institute claimed that agricultural water use efficiency could generate 4-6 million acre-feet of water per year, a number they don’t even use themselves anymore because it was wrong.
Most, not all, excessive farm water is recaptured and reused. Is there still water conservation potential in agriculture? You bet. Is it all cost effective? Not yet but as water conservation technology becomes available and affordable, farmers willingly adopt it. … “

It would be amusing if the situation were not so serious. This is life and death. We have no choice but to change the way we think about and use water. The vast aquifers under California are so depleted that salt water from the Pacific Ocean is seeping into them and raising the salinity levels; crops don't grow in salt water. See here for the U.S. Geological Survey Fact Sheet # 030-02


So, what is my interest in Texas water? I obviously have a financial interest in rain water harvesting as I am a seller of barrels, but I don't sell in Texas. My interest is as a human being because I know that our policies and practices have huge impacts on other people; there will be starvation and deaths because of the United States water policy, this is not really in dispute. Wars will be fought over water.

Wouldn't be nice if we just changed the way we think?

I also don't mean to imply that there is 100% agreement on what is causing the aquifer depletion. Some scientists suggest that as the earths crust cools as our planet ages more surface water is pulled into the mantel.
There is evidence that periodically the core of the earth heats up and much of the aquifer water is expelled from the mantel causing massive and relatively sudden rising of the sea levels. If it rained for forty days and forty nights things would be really muddy and flooded, but the mountains would not be covered with water; it would take something more dramatic, like the under ground oceans unleashing their contents.
"
When the planet was young, steam came from the deep interior to the surface as volcanic gas and eventually produced today's oceans. But as Earth's interior ages and cools, it becomes easier for water to return below the surface.
"So, rather than degassing, now [Earth] may be losing water into the mantle," Sleep said.
This gradual suction of water back below the surface may be a good thing for Earth's geological stability, he notes."


You can't make the oil billionaire and corporate raider T Boone Pickens stop speculating on Texas water, but you can do your part by getting rid of grass, changing to native drought tolerant plants and capturing as much water as you can so that instead of letting the water run along paved roads and into concrete culverts you take personal responsibility and help get that water where it belongs; into the soil under your feet.
You can also write the law makers in Texas and let them know that their " right to capture " law is ignorant, outdated and is going possibly result in starvation and deaths in millions of people. Remember that Mr. Pickens is absolutely unconcerned about killing off small farming communities in his quest to make billions on water rights when you hear his name being mentioned as possible presidential material. He doesn't care about the states that surround Texas or that there are millions of Americans who are beginning to find food and fuel prices unsustainable.
Please visit www.peacewater.org and make a contribution so that they can continue to educate people, save lives and make the world a HAPPY place! It is a non-profit organization that promotes health drinking water, rain water harvesting and outreach to Churches. A.B. Raingutters is not a representative of peacewater.org and  my business is not endorsed by their organization in any official capacity. I assist the technology team in determining which efforts will be funded and implemented and am pleased to be part of the mission to Rwanda in May. 

Monday, February 28, 2011

Earthworks in Rain Water Harvesting

This provides general information on Earthworks in the context of Rain Water Harvesting ( RWH ) and in specific information about Rwanda for the Technology Team for the upcoming project www.peacewater.org is leading to help bring clean water to the people of Rwanda and beyond.
Underlined text are links to expanded information.


Rain Water Harvesting Earthworks

One of the main purposes of Earthworks in rain water harvesting is to replenish ground water storage aquifers in areas where large numbers of wells are drilled. Another purpose is to capture rainwater in terraces and directly water crops planted on them.
Excessive drilling and harvesting of underground aquifers can lead to drought and unsustainable situations for people dependent on wells for their drinking water. The must sustainable approach involves a combination of sensible and educated planning of crops and rotation, well drilling and ground water replenishment. A water harvesting Earthwork without associated vegetation is dead. It can quickly erode, clog with slit, breed mosquitos and excessively evaporate water. Vegetation stabilizes soil; roots expand, canopies grow, leaves fall and new top soil is formed. Insects attract birds and plants attract bees and the fresh water attracts wildlife completing the cycle.

Some Types of Earthworks;

Infiltration Basin

Infiltration Basins
Infiltration basins help prevent flooding and downstream erosion, and improve water quality in adjacent waterways. It is essentially a shallow artificial pond that is designed to infiltrate storm water though permeable soils into the groundwater aquifer. Infiltration basins do not discharge to a surface water body under most storm conditions, but are designed with overflow structures (pipes, weirs, etc.) that operate during flood conditions.
For in depth explanations of infiltration basins click here.


Terraces
A terrace, for the purposes of rain water harvesting Earthworks are relatively flat shelves built parallel to contour on a slope. The purpose is to create a level planting area to intercept direct rainfall and runoff from a slope and is suitable for up to a 48.8% grade but are not suitable to areas prone to waterlogging.
For in depth explanation of terraces in rain water harvesting context and beyond click here. 

Radial planted terrace in Rwanda


Water-Harvesting Swales, Soil Conservation Swales and Diversion Ditches
Diversion Swales and soil imprinting are more likely used in areas where preventing or reversing desertification is the issue.
A 'swale' is simply a long, shallow depression in the ground, designed to collect or redirect water. In general, permaculture swales are used to mimic the water-collecting and -holding abilities of a thick forest mulch.
Swales are most useful in reforestation of degraded, mostly-bare, arid or semi-arid hillsides, to direct water to trees (this water would otherwise run off the bare soil and be lost to the local landscape). In a healthy forest with a thick mulch of leaves or needles covering the ground, very little runoff occurs and swales would usually be unnecessary. A healthy forest is very good at managing its own water resources, and it is usually only Earth that is stripped of vegetation that needs to be rehabilitated.
For permacultural purposes, there are three main types of swale used in water-management earthworks:
  • on-contour, water-harvesting permaculture swales;
  • gently sloped water-transporting swales (or diversion ditches); and
  • soil conservation swales (a modified form of diversion ditch).
  • For an in depth explanation of bio-swales click here. 

Bioswale


Check Dams


A check dam is a small dam, which can be either temporary or permanent, built across a minor channel, swale, bioswale, or drainage ditch. Similar to drop structures in purpose, they reduce erosion and gullying in the channel and allow sediments and pollutants to settle. They also lower the speed of water flow during storm events. These features help the root systems of plants upslope of the check dam by charging the water into the soil.
Check Dam


For a expert explanation of a check dam click here.


Desertification in Rwanda?

The U.N. Plan

The Government of Rwanda , in 2010- guided by a UN pilot project that mapped and developed a comprehensive plan for land suitability and use - has allocated US$25 million to relocate human settlements from the Gishwati Forest. Those resources were expended to correct years of deforestation that is causing erosion, landslides, deaths and poor water quality.
A knowledge base about the importance of vegetation and rain water harvesting Earthworks would possibly have rendered these millions available for use elsewhere. Application of these concepts may save hundreds of millions of dollars going forward.

The NASA study

1978, the Gishwati Forest had substantial ground cover and still remained largely intact in 1986. But in the 15 years that elapsed between the genocide and 2001—wave after wave of refugees arrived in Gishwati Forest and began clearing it, often for subsistence farming. By 2001, only a small circular patch of native forest remained—1,500 acres of the forest’s original 250,000. To view photos and read the NASA study, click here.

Not so much an issue in the near term, but in the long term erosion, water quality and food resources all stand to be major issues and can be mitigated through the use of rain water harvesting Earthworks.


For further reading please see Brad Lancasters website.


Sunday, February 6, 2011

How to Attract Humming birds in los Angeles

It's hard to say how much is spent every year on bird feeders, or fertilizers for lawns but an estimated 40% of residential water usage every year in Southern California goes to water lawns and landscapes. Often these areas are heavily fertilized and the run off usually goes into concrete culvers for treatment in tax subsidized water treatment plants. 20 % of the energy consumed in California goes for the transport, treatment or distribution of drinkable water.
Meanwhile, the natural life we claim to love and respect must look elsewhere for its nutrition. Here then is my suggestion on how to attract wild life and conserve water.


 To attract hummingbirds; first get rid of your grass. Plant succulents and flower bearing annuals native to the region. The flowers of these native plants will please our eyes and they will attract wildlife. Bark, mulch and stone make up the balance of the landscape.


I know, this concept is uncomfortable but imagine paying less for water and having an award winning yard...


Grass is not just unwise, it is bad for the environment.

 Once drought tolerant plants are established and healthy you really need no more than rain water to keep them beautiful. A irrigation system incorporating rain and city water can be turn key. These landscapes will support the natural ecosystem by providing bees with pollen and hummingbirds with natural organic nectar. They are also beautiful.

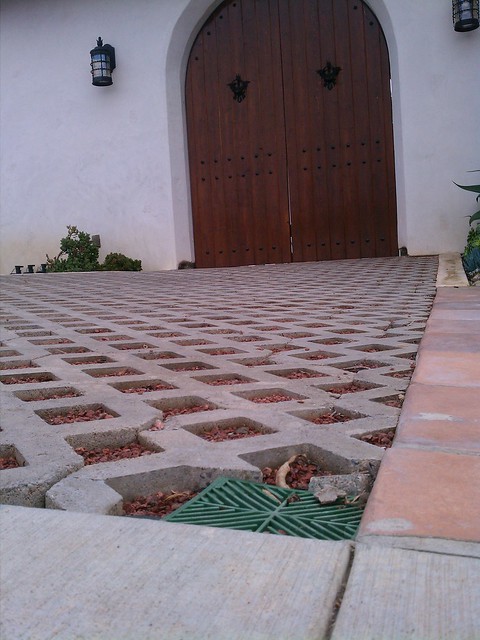
A further step is to eliminate oil based black top or concrete driveways and replace with permeable surfaces that absorb water and  divert the excess to infiltration basins in planted terraces;


Downspouts should be positioned near a drain that feeds lower flower boxes or planters. This downspout feeds the flowers near it and when that planter is full it feeds a drain that collects water from the walkway and to a lower planter; the downspout about and the enclosed planter here;


An attractive addition to this water garden is a wine barrel from a Temecula winery;


I hand made the bronze fluer-dis-lis brackets and preparred the wine barrel by adding the inlet, a spigot, a overflow and the plug in pump, visible at the base.


Please consider watching this video about the ignorant way we manage our resources and see my website at www.abraingutters.com

Photos of the above project can be found here; 


The Cycle of Insanity: The Real Story of Water from Surfrider Foundation on Vimeo.

Thursday, January 20, 2011

Watch out, they're making a new law about rain water harvesting.

WHY AM I AFRAID?
Well for one, the law basically states that only landscape contractors are going to be authorized to install rainwater harvest systems. hello?! I'm a rain gutter contractor. Now I will be forced to get a general contractors license. For another thing, if the homeowners are required to go to a miserable government agency, pay a fee and then be subject to inspections they are likely to say forget it and not harvest rain at all. Cannot the government just for once get out of the way? California state officials have proven that if they get involved they will over complicate, over tax and over regulate, just like they do with anything else.

From Arcsa:
California's Hope To Enter the Rainwater Harvesting Paradigm
By Neal Shapiro, CSM - ARCSA Member 

2011 could become a "watershed" year for California with the passage of AB1834, literally.  While many states, and other industrialized countries, have and continue to move toward a more sustainable approach to local water management, California has been silent on regulations to permit rainwater and stormwater harvesting for indoor and outdoor non-potable and potable end uses at a critical period when reliance on imported water resources is unreliable and unsustainable state-wide.  While the state water code defines potable, recycled and gray water resources, it is silent on rainwater and stormwater.  Some interpret this to mean that their uses are allowed, though no uniform set of guidelines and regulations, permitting and inspections exists to provide a regulatory system that is user-friendly to those who want to use these local water resources.  Due to this void, to make this a permissible activity, regulations for another water resource are used to formulate a regulatory framework, resulting in a cumbersome system that is a regulatory maze, cost-prohibitive and fails to promote a sustainable activity.  AB1834 will provide a uniform standard for rainwater harvesting and use, and give flexibility to local agencies to implement this sustainable strategy.  At a time when the state and the western United States continue to face drought, adding a local water resource to the overall water management mix is a welcome, necessary, and bold step.

AB1834 is expected to be re-introduced by Assemblyman Jose Solorio (D-Santa Ana, 69th District) into the state legislature in the first quarter of 2011.  The bill defines rainwater, rainwater capture system (systems on a parcel, onsite catchment), stormwater and stormwater capture system (systems with offsite catchment from the MS4 and surface waters); it will allow indoor and outdoor end uses; and it focuses on rainwater use on private and public parcels.  Stormwater applications are not authorized due to the need for a stakeholders' discussion on how stormwater harvesting impacts the balance between local uses and water rights of water agencies.  Western water law is a unique challenge for many states and locales when it comes to rainwater-stormwater harvesting.  Utah and Colorado are two examples where this has become a roadblock for rainwater harvesting.  And it could be in California areas where surface waterways are used for recharging aquifers.  A small group of interests, including non-governmental organizations, cities, and water agencies, has been working with the Assemblyman's staff to craft a bill that at a minimum can put California on a preliminary sustainable water management path.  Once this bill is passed and positive experience is gained, further steps can be taken to expand rainwater uses to larger government stormwater use projects and potable applications.

In the meantime, some rainwater harvesting programs exist around the state.  San Francisco, the city and county of, passed a Memorandum of Understanding in 2008 that establishes a legal framework for rainwater harvesting projects for non-potable indoor and outdoor intended uses.  This MOU is unique because it involves the city and county, building and public health offices, and the public utility commission.  The cities of Los Angeles and San Diego did pilot projects and studies to determine the effectiveness of a permanent rainwater harvesting program.  Santa Monica has a rebate program for downspout redirect, rain barrels and cisterns.  Berkeley has a very effective rainwater harvesting regulatory framework.  And in Southern California, as a region, a small group of cities, LA County Public Works and Public Health, and NGOs have been working for a few years to develop a matrix that allows for a limited number of applications for rainwater and stormwater and under specific filtering and disinfection standards; this document has not been approved.

Indeed, California is on the brink of a significant and bold step toward sustainable water management at a critical time of water supply uncertainty and of climatic change influencing precipitation patterns.  Given the urgency of creating a uniform legal framework for rainwater and stormwater harvesting, 2011 is our year in California for a Rainwater Catchment Act.
AB 1834 (Solorio)
Rainwater Capture Act of 2010.
FULL TEXT 
AB 1834, Solorio. Rainwater Capture Act of 2010.
(1) Under existing law, the State Water Resources Control Board
(state board) and the California regional water quality control
boards prescribe waste discharge requirements for the discharge of
stormwater in accordance with the national pollutant discharge
elimination system (NPDES) permit program and the Porter-Cologne
Water Quality Control Act. Existing law authorizes a regional water
management group, as defined, to adopt an integrated regional water
management plan that addresses specified matters. Existing law
authorizes a city, county, or special district to develop, jointly or
individually, stormwater resource plans that meet certain standards.

This bill would enact the Rainwater Capture Act of 2010, which
would authorize a landowner to install, maintain, and operate, on the
landowner's property, a rainwater capture system meeting specified
requirements. The bill would authorize a public agency to lead a
statewide stakeholder process to consider and address issues arising
out of expansion of rainwater and stormwater capture. The bill would
require participants in the stakeholder process to be responsible for
costs incurred as a result of their participation and would require
the initiating public agency to be responsible for specified costs.
(2) Existing law, the Contractors' State License Law, creates the
Contractors' State License Board within the Department of Consumer
Affairs and provides for the licensing and regulation of contractors.
Existing law authorizes a landscape contractor working within the
classification of his or her license to enter into a prime contract
for the construction of a swimming pool, spa, or hot tub, an outdoor
cooking center, or an outdoor fireplace, if certain conditions are
met. Under existing law, a violation of these provisions and related
provisions of existing law is grounds for disciplinary action.
This bill would additionally authorize a landscape contractor
working within the classification of his or her license to enter into
a prime contract for the construction of a rainwater capture system,
as defined, if the system is used for landscape irrigation. The bill
would authorize a landscape contractor holding a specified
classification to design and install all exterior components of a
rainwater capture system that are not a part of, or attached to, a
structure.


THE PEOPLE OF THE STATE OF CALIFORNIA DO ENACT AS FOLLOWS:

SECTION 1. Section 7027.5 of the Business and Professions Code is
amended to read:
7027.5. (a) A landscape contractor working within the
classification for which the license is issued may design systems or
facilities for work to be performed and supervised by that
contractor.
(b) Notwithstanding any other provision of this chapter, a
landscape contractor working within the classification for which the
license is issued may enter into a prime contract for the
construction of any of the following:
(1) A swimming pool, spa, or hot tub, provided that the
improvements are included within the landscape project that the
landscape contractor is supervising and the construction of any
swimming pool, spa, or hot tub is subcontracted to a single licensed
contractor holding a Swimming Pool (C-53) classification, as set
forth in Section 832.53 of Title 16 of the California Code of
Regulations, or performed by the landscape contractor if the
landscape contractor also holds a Swimming Pool (C-53)
classification. The contractor constructing the swimming pool, spa,
or hot tub may subcontract with other appropriately licensed
contractors for the completion of individual components of the
construction.
(2) An outdoor cooking center, provided that the improvements are
included within a residential landscape project that the contractor
is supervising. For purposes of this subdivision, "outdoor cooking
center" means an unenclosed area within a landscape that is used for
the cooking or preparation of food or beverages.
(3) An outdoor fireplace, provided that it is included within a
residential landscape project that the contractor is supervising and
is not attached to a dwelling.
(4) A rainwater capture system, as defined in Section 10572 of the
Water Code, used for landscape irrigation.
(c) (1) Work performed in connection with a landscape project
specified in paragraph (2), (3), or (4) of subdivision (b) that is
outside of the field and scope of activities authorized to be
performed under the Landscape Contractor (C-27) classification, as
set forth in Section 832.27 of Title 16 of the California Code of
Regulations, may only be performed by a landscape contractor if the
landscape contractor also either holds an appropriate specialty
license classification to perform the work or is licensed as a
general building contractor. If the landscape contractor neither
holds an appropriate specialty license classification to perform the
work nor is licensed as a General Building contractor, the work shall
be performed by a Specialty contractor holding the appropriate
license classification or by a General Building contractor performing
work in accordance with the requirements of subdivision (b) of
Section 7057.
(2) Notwithstanding paragraph (1), a landscape contractor
performing work under the Landscape Contractor (C-27) classification,
as set forth in Section 832.27 of Title 16 of the California Code of
Regulations, may design and install all exterior components of a
rainwater capture system, as defined in Section 10572 of the Water
Code, that are not a part of, or attached to, a structure.
(d) A violation of this section shall be cause for disciplinary
action.
SEC. 2. Part 2.4 (commencing with Section 10570) is added to
Division 6 of the Water Code, to read:

PART 2.4. Rainwater Capture Act of 2010


10570. This part shall be known, and may be cited, as the
Rainwater Capture Act of 2010.
10571. The Legislature finds and declares all of the following:
(a) As California has grown and developed, the amount of
stormwater flowing off of buildings, parking lots, roads, and other
impervious surfaces into surface water streams and flood channels has
increased, thereby reducing water allowed to infiltrate into
groundwater aquifers and increasing water and pollution flowing to
the ocean. At the same time, recurring droughts and water shortages
in California have made water conservation efforts a priority.
(b) Historical patterns of precipitation are predicted to change,
with two major implications for water supply. First, an increasing
amount of California's water is predicted to fall not as snow in the
mountains, but as rain in other areas of the state. This will likely
have a profound and transforming effect on California's hydrologic
cycle and much of that water will no longer be captured by California'
s reservoirs, many of which are located to capture snowmelt. Second,
snowmelt, and runoff resulting from snowmelt, are predicted to occur
progressively earlier in the year, and reservoirs operated for flood
control purposes must release water early in the season to protect
against later storms, thereby reducing the amount of early season
snowmelt that can be stored.
(c) Rainwater, captured and properly managed, can contribute
significantly to local water supplies by percolation into the ground
to recharge groundwater aquifers, thereby increasing available
supplies of drinking water. In addition, the use of rainwater through
onsite storage and use for landscape irrigation significantly
reduces the demand for potable water, contributing to the statutory
objective of a 20-percent reduction in urban per capita water use in
California by December 31, 2020.
(d) Expanding reliance on rainwater capture for water supply needs
will require efforts at all levels, from individual landowners to
state and local agencies and watershed managers.
10571.5. Nothing in this part shall be construed to do either of
the following:
(a) Alter or impair any existing rights.
(b) Change existing water rights law.
10572. Solely for the purposes of this part, and unless the
context otherwise requires, the following definitions govern the
construction of this part:
(a) "Agricultural lands" has the same meaning as defined pursuant
to Section 56016 of the Government Code.
(b) "Developed or developing lands" means lands that have one or
more of the characteristics described in subparagraphs (A) to (C),
inclusive, of paragraph (4) of subdivision (b) of Section 56375.3 of
the Government Code.
(c) "Rainwater" means rain or snowmelt that has not entered an
offsite storm drain system or channel, a flood control channel, or
any other stream channel, and has not previously been put to
beneficial use.
(d) "Rainwater capture system" means a facility on developed or
developing lands, but not on agricultural lands, designed to capture
and retain rainwater flowing off of a building, parking lot, road, or
any other manmade, impervious surface, for either subsequent
outdoor, nonpotable uses or infiltration into a groundwater aquifer.
(e) "Stormwater" means temporary surface water and snowmelt runoff
generated by immediately preceding storms. This definition shall be
interpreted consistent with the definition of "stormwater" in Section
122.26 of Title 40 of the Code of Federal Regulations, as that
section may be amended.
10573. (a) A landowner may install, maintain, and operate, on the
landowner's property, a rainwater capture system to supply water for
outdoor, nonpotable uses on the property where the rainwater was
captured or for groundwater recharge. If a local agency has a program
to promote rainwater or stormwater capture and use, the landowner
shall comply with applicable requirements of the program, including,
but not limited to, a stormwater resource plan adopted pursuant to
Part 2.3 (commencing with Section 10560).
(b) Financing pursuant to Chapter 29 (commencing with Section
5898.10) of Part 3 of Division 7 of the Streets and Highways Code
shall be available to landowners who install a rainwater capture
system, if a local agency authorizes and arranges that financing
consistent with the requirements of that chapter.
(c) This section shall not be construed to impose a duty on, or
impair the authority of, a local agency to establish or implement a
program for rainwater capture in its jurisdiction.
10574. (a) It is the intent of the Legislature that the use of
rainwater for nonpotable uses should not be constrained by drinking
water standards in Title 22 of the California Code of Regulations,
but shall fully comply with water quality requirements for nonpotable
water pursuant to the Porter-Cologne Water Quality Control Act
(Division 7 (commencing with Section 13000)).
(b) Notwithstanding subdivision (a), this part does not affect any
additional state, regional, or local requirements for the protection
of groundwater quality from contamination resulting from stormwater
drainage.
10575. (a) It is the intent of the Legislature to encourage
collaboration among state, regional, and local agencies with
responsibilities that include, but are not limited to, building
standards, flood protection, water supply, or land use to promote
greater capture of rainwater and stormwater for water supply
purposes.
(b) It is the intent of the Legislature that the California
Building Standards Code, including the California Green Building
Standards Code (Part 11 (commencing with Section 101) of Title 24 of
the California Code of Regulations), encourage and provide building
standards guidelines for the installation and use of rainwater
capture systems for outdoor, nonpotable uses and groundwater
recharge.
10576. (a) The Legislature finds and declares that, in order to
expand rainwater and stormwater capture broadly, many legal, policy,
and technical issues will need to be addressed and resolved, and the
best way to address these issues is to develop recommendations for
policies of state and local agencies that would encourage and
facilitate the voluntary installation and use of rainwater capture
systems for outdoor, nonpotable uses and groundwater recharge, and
capture of stormwater by public agencies.
(b) A public agency, including, but not limited to, the
Metropolitan Water District of Southern California or the California
State University Water Resource and Policy Initiative, may lead a
statewide stakeholder process to consider and address the issues
arising out of the expansion of rainwater and stormwater capture. If
a stakeholder process is initiated, the initiating public agency
shall invite all stakeholders, and federal, state, and local agencies
concerned about rainwater and stormwater capture to participate.
(c) A stakeholder process initiated pursuant to this section may
consider all of the following issues:
(1) Vector control.
(2) Water supply augmentation.
(3) Water quality, including but not limited to both of the
following:
(A) First rain contamination hazards.
(B) Potential changes in the concentration, quantity, or abundance
of runoff pollution from increased rainwater collection.
(4) Safe installation, maintenance, and operation of rainwater
capture systems.
(5) Water rights.
(6) Vegetation and habitat management in flood control facilities
and rainwater or stormwater capture systems.
(7) Effects on downstream, in-stream flow volumes and native fish
and wildlife.
(8) Consistency with building standards requirements, including
the building drainage requirements of Chapter 11 of the California
Plumbing Code (Part 5 (commencing with Section 101.0) of Title 24 of
the California Code of Regulations).
(9) Potential for indoor, nonpotable use of captured rainwater for
toilets and laundry.
(10) Financial and tax incentives to encourage greater capture of
rainwater and stormwater.
(11) Necessary monitoring and reporting of rainwater and
stormwater capture programs.
(12) Outcomes of existing programs that promote rainwater or
stormwater capture.
(13) The financial feasibility of each of the recommendations.
(d) Participants in the stakeholder process shall be responsible
for costs incurred as a result of their participation. The public
agency that initiates the stakeholder process shall be responsible
for the costs of the meetings and the preparation of any report on
the conclusions or recommendations of the stakeholder group.

Sunday, January 16, 2011

The A.B. Raingutters YouTube channel

A.B. Rain Gutters now has a Youtube Channel.
 You can check it out here; short clips about rain water harvest devices, testing and urban waste of water.


The test results are in and they show that the water quality is not up to drinking standards as they show coliform bacteria which can cause some unpleasant bathroom centered problems when consumed. So in addition to storing that water the homeowner should make plans to treat this water before it is consumed. The two pictures below show rain water harvested from Costa Mesa and Tustin, California. One had a first flush device and the other had gutter glove as a first stage filtration. Both showed coliform bacteria after 27 hours. The brown color of the water from the first pix is because of the growth media which will blossom in the presence of fecal matter and turn the water black and poisonous. The black water in the second pix does not look appealing at all.


A view of the first flush device one one of the two systems tested.


So, while a first flush device helps clean the water and that is good enough for the garden plants it is not enough to make the harvested rainwater safe to drink without a bio-sand or other type of filter or chlorine chemical treatment.

Sunday, January 2, 2011

Expert Gutter Installations

Installation Instructions
For products by
The Copperworks of Don Miller, and other expert installations.

A photo alternative with differing methods is here.

Table of Contents


Safety

Ladder Accessories
An item that should be mandatory for all ladders is adjustable swivel feet. The main purpose of these feet is to adjust to uneven ground surfaces. The second purpose of these feet is that the ball joint type swivel pads provide excellent traction on uneven surfaces. These feet are called XTENDA LEG TM, and might be found at a painters supply store.
Also very useful in some situations is a special ladder jack that allows the ladder to rest against the roof surface, and allows a large enough gap between the edge of the roof and the ladder to pass the gutter through. The ladder jack might also work while leaned against the wall where the eave does not extend past the span of the ladder jack. It is important for stability that the ladder jack has a broad span of several times the ladder width between the ladder jack legs.

Scaffolding
Be prepared to use properly installed scaffolding where it will improve safety or the ease of installation.

Fall Arrestors
Some companies produce fall arrestors for use with ladders, and other fall arrestors for other locations such as on the top of roofs and scaffolding. The unit mounts to a secure location, and a spring loaded cable attaches to the worker. If the cable pulls out too quickly, the arrestor locks up.
Aros Inc. - 883 South 200 East, Salt Lake City, UT 84111 (801)531-9279, fax 9966, http://safety.aros.net
Miller / Dalloz - 1355 15th St., Franklin, PA 16323 (814)432-2118, fax 2415 www.cdalloz.com

Climbing Equipment
Sports climbing equipment can sometimes offer a vital safety backup system, or may provide a sole means of support in daring situations on rooftops.
Some basic climbing equipment which might be useful to an installer might be a harness, 100 feet or more of high quality perlon, a pair of Jumars (tm), and stirrups, 4 locking steel D shaped carabineers, and several 4 foot loops of webbing.
Climbing equipment should be carefully inspected before each use. Nylon is subject to degradation from excessive ultraviolet exposure, heat, and chemicals such as the acid in animal urine which can cause a 50% loss in strength with no visible damage. The carabineers should be of steel rather that the more common aluminum, because aluminum carabineers can develop invisible cracks over time, in an abusive environment, and have been known to fail without warning. (These cautions are garnered from scientific testing and real incidents from within the organized sport of hang gliding, and form part of their safety standards. www.ushga.org)

Fire Safety
Always keep a fire extinguisher at hand at your work site. Keep flammables away from the soldering furnace. Don’t leave a lit soldering furnace unattended. Keep soldering equipment in a well-ventilated environment. Solder occasionally splatters explosively. Always use eye protection while soldering.

Delicate Roofs
Some installation requires working and putting ladders on delicate roof surfaces such as Spanish tile and slate. It is good business for a contractor to consider this factor before entering into an agreement with the property owner, and to discuss how matter such as broken tiles will be dealt with. Sometimes one might photograph and document broken tiles before and after a contract, especially if other trades are concurrently working on the roof, in order to help delegate responsibility in the event of damage to the roof surface.
One should always have a strategy for walking on a particular roof surface. On Spanish tiles it is best to distribute the weight of each foot onto two tiles, with the toe on the center of one tile, and the heel on the center of the next one. Avoid stepping on tiles that are on the edge of the field and on hips and ridges.
One method that works well with many delicate roof situations is having a number of burlap bags loosely filled with wood chips, to distribute the load and avoid cracking tiles. Wood planks can be set on these bags, on which ladders with adjustable legs might also be secured. The wood planks might also be secured from sliding off of the roof in some manner


Planning

Following is a most important reference book for the raingutter installer. Most contractors’ size raingutters and downspouts based on experience of what works or doesn’t work in a particular region, however it is a good idea for the professional installer to have some solid math based sizing formulas to follow.
Architectural Sheet Metal Manual - (ASMM)
By the Sheet Metal and Air Conditioning Contractor’s National Association, Inc. (SMACNA)
4201 Lafayette Center Drive, Chantilly, VA 22021
(703) 803-2989 begin_of_the_skype_highlighting            (703) 803-2989      end_of_the_skype_highlighting, www.smacna.org

Downspout Location
One of the first considerations in raingutter planning is downspout placement, which is largely an aesthetic consideration. In any given desired downspout location, there is a good chance that the location will work for the following reasons:
A) The roofline may be sloping towards the desired downspout location - Good.
B) The roofline may be level towards the desired downspout location - OK, perhaps.
C) The roofline may be sloping away from the desired downspout location, but perhaps the region is hot and dry, so that any standing water will dry fast, and maybe the roof area drained is small.
D) The roofline may be sloping away from the desired downspout location, but there is enough space on the fascia and esthetic considerations make sloping the gutter downward in relation to the roofline acceptable, or if the raingutter large enough, it may be possible to solder a second bottom into the raingutter to force the water to flow towards the downspout. (See instructions on this option later)
Having a little pitch to the gutter might slightly reduce the buildup of dirt and ice, but it is seldom practical or necessary; what is essential is that the gutter be able to dry out in a day or so, to reduce corrosion and to prevent the breeding of mosquitoes. Keeping a galvanized-steel gutter dry is key to its longevity; in a copper gutter, dryness is not as critical.
There is usually no way that a person can say which way a roofline is sloping by simply looking at it. Illusion will always predominate. The most practical way to determine pitch of a long or complex roofline is with a water-level. The results of a water-level survey might affect decisions about downspout placement.

How to make and use a Water-Level
There are various water levels available at hardware stores, but Don Miller found (during his contracting years) that his self-made water-level worked better than commercially available models. Don’s water-level with a reservoir and thin tubing has the advantage that a little water lost, or a little expansion or contraction in the tubing that occurs when the tubing drapes down to various heights, makes no significant change in the level of the water.
The reservoir on the water-level is a discarded disposable plastic I.V. plasma bottle with a large hole cut in the top. Attach to the IV bottle 100 feet of 1/4” clear flexible poly-tubing like that used as air tube in aquariums. At the other end of the tubing attach a brass aquarium valve.
Hang the reservoir filled with water in any convenient location near, but a little below, the level that you will be measuring. If the water has air dissolved into it, give plenty of time for all of the air bubbles to disappear. Set the other end of the tube down in a low area and open the valve. Be sure that absolutely every air bubble is expelled, and then close the valve. Carry the valve end of the tube up to several inches higher than the reservoir level and open the valve. Hold the valve to a point on the roofline that you wish to reference to, and with a marker, make a mark on the tube below the valve, of the level of the water in the tube.
For accuracy it is important to be patient with this small diameter tube and be sure that the level of the water has stopped changing. The first location is a reference point as you go around the fascia and measure how far any particular point is above or below the mark on the tube, and the reference point first measured.
In terms of installing Copperworks bronze brackets, here is a simple example. You may choose to make your first reference point at a location on the fascia furthest from a desired downspout location, and using one bracket held in its highest possible position, make a mark where the lag screw will need to penetrate the fascia. You could then find the same level position on the fascia where the desired downspout location will be, and figure out where a bracket would be positioned at that location for adequate flow, and chalk a line between the two points along which 3/16” diameter holes will be predrilled for the bracket lag screws.

Allow for Expansion and Contraction
A general formula for the rate of expansion and contraction of a copper gutter (in relation to some expansion also factored into the structure) is 1/8 inch per 10 lineal feet copper gutter per 100 degrees farenheight Fahrenheit temperature change. The gutter will lengthen as the temperature rises and shrink as the temperature drops. The temperature at the time of installation needs to be taken into account, as well as the highest and lowest expected temperatures. Be sure to allow for expansion seams in strategic locations along long straight lengths as detailed in the Architectural Sheet Metal Manual. The location of expansion seams may affect downspout placement.
Raingutters installed with Copperworks bronze brackets deal with expansion and contraction well. The back of the gutter is not fastened to the bracket, but can slide in the hook. The bracket can move back and forth somewhat at the front where the gutter is attached, and there is a 3/8” gap between the raingutter back and the fascia where the gutter goes around corners.

Galvanic Corrosion
Copper is at the top of the galvanic scale. Other metals, such as steel, aluminum, and zinc will corrode more quickly when in contact with copper or the flow from a copper pipe. Bronze, brass, some alloys of stainless steel and nickel are compatible with copper. If the copper is contacting a very thick piece of steel or iron in a dry location, the effect on the steel or iron may be negligible. If the surface of the other metal is large and the surface of the copper is small, the effect on the other metal may be negligible. If a copper gutter is being slipped behind a steel flashing, separate the metals electrically, and maybe the flashing will be OK until it is time to reroof. If a large surface of copper is contacting a small surface of the other metal, or if water drops from a copper surface onto the surface of another metal, the other metal may not last long. Be sure that all fasteners for a copper raingutter do not contain any mild steel. If it sticks to a magnet, then it has no place in a copper gutter system.


Installation

Bronze Gutter Bracket Installation

Gutter brackets should be not more than 36 inches apart. This 36 inch maximum spacing of gutter fasteners (brackets) is a standard that is recommended in various publications on the subject, and for various reasons. If the brackets were spaced farther apart, say 48 inches, the raingutter and brackets might still be able to support the weight of being full of water, but one may not be able to lean a ladder against the gutter without damaging it. In freezing areas, where the gutter is subject to ice loads from the roof, brackets are often placed closer to 24 inches apart.
The fascia or row of rafter tails should be fairly well aligned laterally, and be of a consistent vertical angle. Any bracket attachment point that is more than 1/4 inch out of alignment with its nearby attachment points must be adjusted in some manner.
Chalk a line on the fascia or rafter tails on which to drill the holes for the gutter bracket screws. Predrill the lag screw holes with a 3/16” by 12 inch extension drill bit before installing the lag screws.
If the brackets are being attached to masonry or stone, then lead caulk-in anchors and 1/4” stainless steel machine screws are used to bolt the brackets to the anchors.
Bolt the brackets to the surface with the lag screws.
The 1/4 inch lag screws should NOT be tightened snug! It should be tightened until the head of the screw just contacts the bracket, and the bracket is flush against the mounting surface, but the bracket retains some flexibility.
There are several reasons for this. 1) So that the bracket may be moved slightly to help with gutter to bracket fastener installation. 2) Gutter brackets that are slightly tipped up or down due to an uneven mounting surface will be naturally brought into line during the phase of attaching the gutter to the bracket if they are not tightened too tight. 3) As the raingutter expands and contracts, it is able to move the front end of the bracket where it is attached to the gutter.
Place the gutter in the brackets. The back portion of each bracket is inspected to see that the gutter is seated into the bracket hook. The bracket is held in a square and true position, and the gutter is held firmly into the bracket.

Further instructions for Moderne style gutter brackets only.
A 1/4” hole is drilled through the existing hole in the front of the bracket and through the gutter. Install the brass oval-head screw and locknut and washer.

Further instructions for ornate styles of gutter brackets only. (not Moderne styles)
The front bead of the gutter is pushed back just slightly to view the location of the screw hole in the front of the bracket. A sharply pointed scribe may be used to make a dimple in the outside face of the gutter directly over the small screw hole. A 1/4” hole is drilled through the front side of the gutter from the outside or from the inside of the gutter. The bracket is pushed enough to the side during drilling, to prevent drilling into the bracket.
If drilling from the inside of the gutter, use a small right angle drill and a 1/4” drill bit that has been ground down so that just 1/4” of drill bit extends from the chuck. Install the small stainless steel screw and brass washer from the inside of the gutter using a stubby screwdriver.

Further instructions for all gutter brackets.
When viewed up close, the installed gutter rarely contacts the gutter bracket along the entire inside bracket surface. These gaps are usually unnoticeable from normal viewing angles (and as the copper ages). If any such gap is bothersome, then carefully fill the gap with a small bead of dark brown silicone rubber.
Once the bracket and raingutter has been installed, if a bracket still looks a little crooked, then tip the bottom of the bracket to the left or right to improve the appearance.

Dings
During the placement of the gutter into the brackets and at other times, small dings may occur. Even large dings are often not noticeable once the gutter has patinaed, but on bright reflective copper even the smallest ding stands out when viewed from a distance. This can cause the client concern that is often seen to be unjustified as the copper ages, but is business problem non-the-less, because payments often need to be received while the material is still shiny. Dings can be reduced, if not eliminated, by massaging the gutter from the inside with the blunt plastic handle of a stubby screwdriver, or some similar device. Also the copper surface can be buffed with scotchbrite (tm) to reduce reflectivity.

Gutter Seams
A long lasting material such as copper should always get the best quality seam, which is one that has been riveted and soldered.
Hide the gutter seams behind the gutter brackets through a little advance planning. Overlap 2 lengths of gutter 1 inch at seams. Use CB42D rivets spaced on 1&1/2 inch centers. The seam should be soldered immediately upon installation of the rivets in order to prevent elongation of the rivet holes due to thermal expansion and contraction of the gutter. Care should be taken to see that the solder penetrates to the center of the rivet. Rinse the seam with water after soldering. Spray a stream of fresh water into the outside of the gutter seam. After plating and rinsing, a little high quality caulking might be placed where solder was not possible to access.

Copper Rivets
A copper rivet should not contain mild steel in the rivet or in the pin. Watch out for copper plated steel rivets or copper plated steel pins. If any part of the rivet sticks to a magnet, then the steel will expand and cause a leak or stain the copper. See Copperworks catalog for sources.

Gutter Miters
The cleanest looking gutter miter is cut into the stock material itself, using a gutter miter pattern. Leave a raw edge on one piece of gutter, and 3/4” tabs on the other piece of gutter. The overlap of the tabs should be cut so that they lay opposite to the way that the shingles of a roof would overlap, so that the solder will flow down into the seam easily. Approximately every third tab is riveted. The seam is soldered from the inside. Soldering starts with the upper vertical areas of the seam, and progresses down to the easier flat areas.
Prefabricated gutter miters are not recommended, but might be used if they meet the following qualifications.
1) The shape, size, and profile of the miter match that of the raingutter while the gutter sits in the gutter brackets being used.
2) Gutter brackets may hide the two gutter to miter seams on the prefabricated miter.
3) The factory seam in the middle of the miter must be soldered, and no other type of sealant should be used other than solder.

Roof-To-Wall Flashing
Most often, at locations where the end of a gutter butts into a wall, there should be a special roof-to-wall flashing. This flashing should pitch downward a little so that water will not drip back along its underside. Lay a bead of sealant along the top edge between the gutter end and the wall, and anywhere else that water might leak in this vulnerable area.

Gutter Mitered End Caps
A Return End is another name for this item. Gutter ends that do not about a flat surface are complimented by the style and grace of a mitered end cap.
A 3 piece Gutter Mitered End Cap Pattern Set is used to produce these ends in the field or in the shop. The end of the gutter length to be mitered is cut without tabs using the double ended template. A mitered end is cut from a small piece of scrap gutter material using the appropriate right or left end cap pattern. 1/2” inch tabs are allowed on the end caps. The tabs are cut in such a way so that the overlaps face upward. The tabs on the tubular gutter bead of a traditional half-round gutter are cut 1/4” apart, and 3/8” deep, and are formed with needle-nose pliers.
The end cap is clamped in place with a small c-clamp type vise grip(tm) placed just under the front bead. Align the bottom of the gutter end, and clamp a visegrip(tm) to the flange at the back of the gutter.
The gutter bead is set into a tight fit with the tap of a hammer, and then soldered on the top side of the gutter bead, near the area marked 1 on the pattern set. The c-clamp visegrip(tm) is removed.
The pointed part of the mitered end at the bottom (location 2) is fluxed. A small chunk of solder is set into it, and the location is held in place with a screwdriver, and gets tack soldered in place. The back part of the seam gets tack soldered 3 and the back visegrip(tm) is removed.
All the tabs are set more flush at this point by tapping from the inside. Two more locations may be tacked at 4 and 5. The entire seam is then very well fluxed and soldered primarily from the inside.
When doing this soldering, as well as when soldering gutter miters, it is important that the solder flow all the way out to the outside edge, so that the seam may be sanded flush on the outside surface later.
The seam is sanded smooth on the outside of the gutter first with a 24 grit sanding disk, and then with a 120 grit disk, and is then copper plated.

Double-Bottomed Gutter
One method for dealing with a low area in the gutter is to solder a second bottom into it. This method is best employed with a gutter that already has a deep bottom. A 5 inch half round gutter for example, has rather little capacity in most situations, and may not be a good candidate for this operation.
Start with the gutter completely installed and soldered. Fill the gutter with water and wait for the water to stop draining from the downspout. With a grease pencil mark the edge of the water line. Drain the water by drilling one or more 1/4” holes the lowest area of the gutter.
Mark 6 inch increment lines lengthwise along the low area and assign each mark a letter or number. Measure the width of the water line marks at each 6 inch line and note these measurements. The pieces of second bottom are produced of flat sheet. It is easiest for both production and installation, to keep the pieces less than 4 feet. Allow each piece to overlap the next at least 1 inch. Allow a 1/2 inch flange along the edge of each piece.
The pieces get soldered into the gutter. It helps in soldering to tack each piece in place every 6 inches, and then to solder each alternate 6 inch gap, and then go back and solder the remaining 6 inch gaps.

Radius Raingutter
Locations with curved roofs should have truly curved raingutter. Not a gutter composed of small straight pieces soldered together. The human eye is very discerning to lack of perfection in curved surfaces.
Radius gutter is custom produced at Copperworks in generally from 4 to 10 foot lengths. Shorter lengths not only are easier to ship, but any inconsistency or miscalculation in radius is divided up in finer increments. On one end of each piece is provided an internal sleeve to slip to the inside of the next piece, for a flush outside surface.

Radius Gutter Template
Using a water level, draw a line around the curved fascia which will represent the level of the upper back edge of the radius gutter. Cut a large sheet of cardboard into 4 to 6 foot long strips. The strips should be about 3 times as wide as the space that the curve will cross over for the given length of cardboard (see illustration). Start at one end of the fascia or a specific location marked by a short vertical line on the fascia. Label the first piece of cardboard A. Meticulously cut and trim the cardboard until it matches the curved fascia as perfectly as possible. One corner of cardboard A should align on the first line made on the fascia. Make another short vertical line on the fascia at the other corner of the cardboard. At approximately the center of the first two lines on the fascia make another line. Take a second piece of cardboard and label it B, and align one corner with the middle mark of A. Trim B until it is perfect and make another mark on the fascia at the other corner of cardboard B. Label a third piece of cardboard C, and align it with the existing mark that is the far edge of A, and the center point of B. Label the other side of the mark C. Trim C


TO BE CONTINUED